
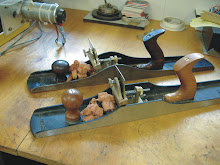
Most investment cast miniatures I have made over the years start with making the model.Sometimes the model is made from blocks of wax,delrin,wood,or brass. Material selection is driven by the different challenges or features the model must have. After the model is made the next step is making an RTV (room temperature vulcanizing ) mold. The mold is injected with hot wax to produce multiple wax patterns that will be invested and cast with bronze, silver or gold.
The process I chose for the "slipper plane" was similar with a few changes, most changes were a result of not being satisfied with the design and wanting to tweak or change it along the way.
Although the antique plane was "cute" I wanted to keep the cam feature but enhance the design of the planes side profile and give it a custom or modern design.
 The above photo shows a wax injection from the RTV mold. This wax was invested and cast in silicone bronze. The next photo is the assembled bronze casting from one of the waxes.
The first step was to take one of the original waxes and modify it to the new profile as shown in the following picture. The sides were added by doing a cut and melt using a special flexible wax. The red and yellow waxes are main sprues and feeder sprues used to evacuate the wax during wax burnout and also serve as feeder lines when pouring the molted metal into the heated and cured investment.(think of investment as a fine sand similar to plaster of Paris.
 The first modification was close to what I was looking for but It was "no Cigar".
Because the first modified wax was lost (lost wax casting) the new attempt was like starting from scratch. Using another original wax it was cut and melt time again to form the new design. The next two pictures show the second attempt wax model and casting.
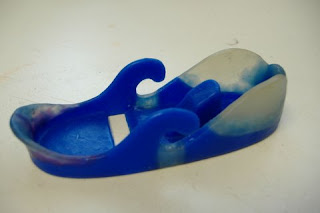
 The second attempt looked a little better but needed a little more pizazz. The casting was then hand engraved with a deep relief to provide the required depth in the finished casting.
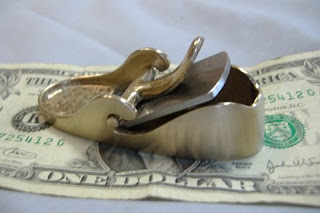
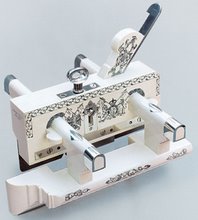
 A final mold was made from the engraved model. The next picture shows a casting of the plane in silicone bronze. Notice the additional material that was added to the base of the casting,this was done to provide additional metal to allow for sanding the plane bottom without getting it too thin. The pink wax next to the casting shows the additional stock that was added. After casting and grinding the overhang of this extra stock I decided it was too much trouble to clean the overhang off .The next castings which were done in red brass the overhang was left which gave the appearance of a sole on ones shoe.After showing this version to a friend ,who is a model maker and has a good eye for design and proportions, he made the comment "it looks like a slipper". This was how the plane received its name and it has stuck.
That's my story and I am sticking to it.
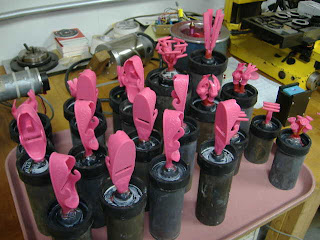
 At this point it was time for production to begin. Following shots show a group of final waxes and a view of what the red brass castings look like before pickling the castings and final polishing. The last two shots show the completed project.I started delivery last week and have sold out the first production run, I'll be casting another larger batch next week. If you have any questions or comments I will try and answer. hamlertools@alltel.net
Paul


 Hand engraved 01 tool steel blade.

No comments:
Post a Comment